Little Andy Acorn Crochet Pattern: Easy Step-by-Step
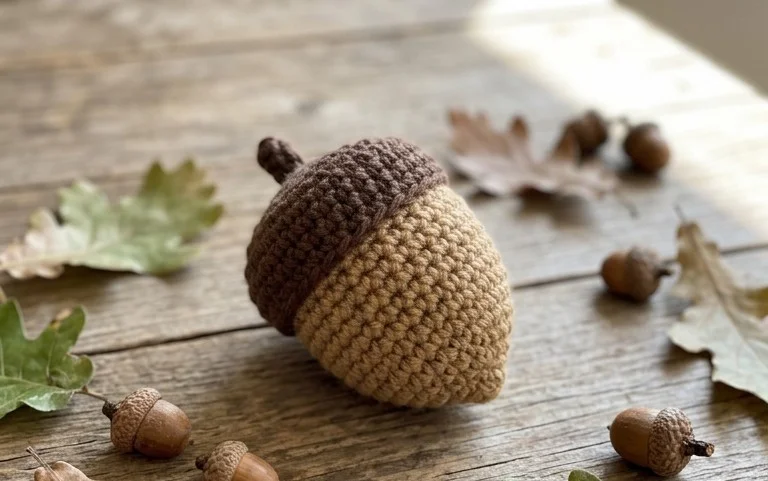
A little crochet nut sits comfortably in the palm of your hand, offering a dense, weighted feel that makes it a charming piece for seasonal displays or a woodland-themed nursery shelf. Beginners often find this pattern rewarding because it moves quickly from a simple magic ring into a sturdy, squishy shape that holds its form without needing extra stuffing reinforcement. You will master the rhythm of increasing rounds and basic shaping techniques while working with standard cotton yarn. Whether you aim to clear out your scrap yarn bin or create a small, thoughtful handmade gift, this woodland accessory offers a quiet, meditative afternoon of construction that builds your confidence in reading structural patterns.
Why This Project Is Worth Making
This beginner-friendly project works up quickly, making it a perfect weekend endeavor for those who enjoy immediate results. It utilizes basic stitches that create a dense, squishy fabric, ideal for functional home decor or handmade gifts. Because it uses a small amount of yarn, it is an excellent way to use up leftover skeins from larger projects without needing to commit to a full yardage purchase. The repetitive motion of the rounds provides a meditative experience for crocheters of all skill levels, helping to improve tension consistency through simple, rhythmic practice.
I finished this in a single afternoon while watching a movie. The instructions were easy to follow and the final result looks professional.
— Sarah, casual crafter
Pattern Overview & Skill Level
- Skill Level: Beginner
- Approximate Time: 2 to 3 hours
- Construction: Worked in continuous rounds from the center outward
- Finished Dimensions: Approximately 6 inches in diameter
Materials & Supplies Needed
- Yarn: Worsted #4 weight, cotton or acrylic blend, approximately 60 yards, in your chosen color.
- Hook Size: 5.0 mm (US H-8).
- Notions: Tapestry needle for weaving in ends, a locking stitch marker to track the start of rounds, and scissors.
- Yarn Substitutions: Wool or wool blends may be used, though they will provide more warmth and less structure than cotton. Using a lighter weight yarn will result in a smaller diameter, while a bulkier yarn will increase the size and require a larger hook.
Stitch Guide & Abbreviations (US Terms)
- MR = magic ring
- ch = chain
- sc = single crochet
- inc = 2 sc in the same stitch
- sl st = slip stitch
- st/sts = stitch/stitches
- BLO = back loop only: Inserting the hook only through the rear strand of the stitch to create a ridge effect.
Step-by-Step Pattern Instructions
Main Body
The piece is worked in continuous rounds. Do not join rounds with a slip stitch unless specified.
- Rnd 1: Start with a MR, work 6 sc into the ring. (6 sts)
- Rnd 2: Work 2 sc in each st around. (12 sts)
- Rnd 3: [1 sc in next st, inc] 6 times. (18 sts)
- Rnd 4: [1 sc in next 2 sts, inc] 6 times. (24 sts)
- Rnd 5: [1 sc in next 3 sts, inc] 6 times. (30 sts)
- Rnd 6: [1 sc in next 4 sts, inc] 6 times. (36 sts)
- Rnd 7: [1 sc in next 5 sts, inc] 6 times. (42 sts)
- Rnd 8: Working in BLO, 1 sc in each st around. (42 sts)
- Rnd 9: 1 sc in each st around. (42 sts)
- Rnd 10: [1 sc in next 5 sts, dec] 6 times. (36 sts)
- Rnd 11: [1 sc in next 4 sts, dec] 6 times. (30 sts)
- Rnd 12: [1 sc in next 3 sts, dec] 6 times. (24 sts)
Finishing
Once you reach the final round, cut the yarn, leaving an 8-inch tail. Pull the tail through the final loop. Use the tapestry needle to weave the end securely into the interior of the piece. If you wish to close the center, pull the magic ring tail tight and knot it on the inside before trimming.
Care & Washing Instructions
- Machine wash in a mesh laundry bag on a gentle, cool cycle to protect the stitch integrity.
- Lay the piece flat on a clean towel to air dry, ensuring it retains its intended circular shape.
- Avoid using high heat in a dryer, as this can shrink natural fibers and distort the crochet fabric.
Pro Tips & Common Mistakes to Avoid
- Maintain consistent tension by holding your yarn with the same amount of pull throughout the entire project; changes in tension mid-project will cause the piece to ripple or pull inward.
- Always place a stitch marker in the first stitch of every round; since you are working in continuous spirals, it is easy to lose track of where a round ends.
- When weaving in ends, pass the needle through the back of stitches in two different directions to lock the yarn in place so it does not unravel after washing.
- If you want a larger finished item, you can add more increase rounds at the beginning, though remember that every additional round will require roughly 15-20 percent more yarn.
Frequently Asked Questions
Can I use a different yarn weight for this pattern?
Yes, but you will need to adjust your hook size to match the recommended tension on the yarn label. A thinner yarn will result in a smaller piece, while a thicker yarn will create a larger, stiffer finished item.
How do I keep my circular edge from ruffling?
Ruffling usually indicates that there are too many stitches in a round. Ensure you are following the increase sequence correctly and verify your stitch count at the end of every round to prevent accidental extra stitches.
Is this pattern suitable for someone who has never crocheted before?
This is an excellent first project. It focuses on the single crochet stitch and simple increases, which are the fundamental building blocks of most crochet items.
Am I allowed to sell items made from this pattern?
You may sell finished items crafted from this pattern, provided you credit the original design and use your own photographs. Mass production or copying the pattern text for distribution is not permitted.
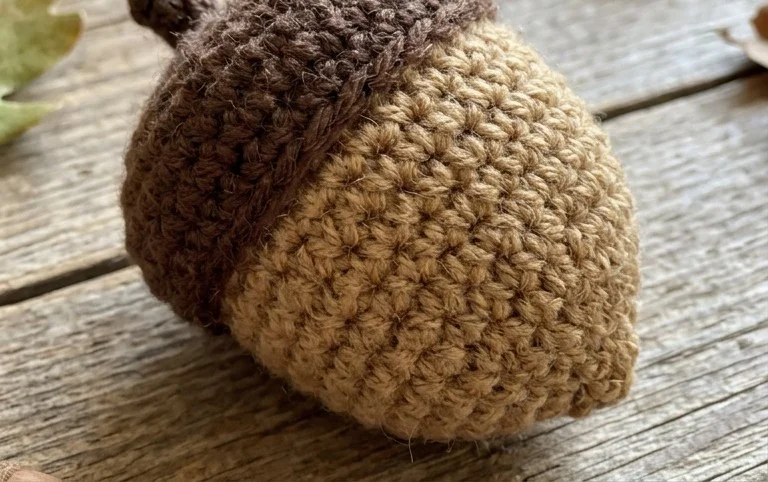
Your finished woodland piece brings a touch of nature to your home and works beautifully as an ornament or a simple desk companion. Experiment with using fuzzy mohair yarn if you want a softer, more realistic look for your project. Sharing a photo of your work on Instagram or Facebook helps other makers see the potential in their own scrap yarn. You can find more free patterns and seasonal craft ideas on my main blog page. I look forward to seeing the different colors you choose for your next batch of these little items.